Its back, and as sexy as ever. The Valmod Overhaul for Alpha16.2 is here, and bringing in the sweet moddness we all love, including class system, new food, new ammo, new weapons and more. To top this off Lotus will also be creating and uploading mods as he can. You must download and install the Valmod Overhaul pack to join the server. I will explain how to do this to install this mod to allow you to still go onto non modded servers, later in this post.
This new server is name Lightbringer, and will go live @ 12pm 8/15/17
We are starting off right by modding almost everything we can. First off
the day length is increased from 60 minutes = 1 day to an odd 103 minutes. This gives us only 2 bloodmoons in 1 RL day. Loot now respawns every 14 in game days which should be once every 24 hours. Loot percentage is now 150%. Airdrops will spawn once per in game day. These are just some of the main configuration changes we are able to now to. We have alot more coming up.
Onto the install.
First we will download the pack using this link (will begin the download) VALMOD OVERHAUL DOWNLOAD.
Next we will open the directory that holds the game files. To do this right-click on 7 Days To Die in your Steam Library, and click on Properties. Under the “Local Files” tab click on Browse Files. This will open a new window containing your 7DTD files. Now in the navigation bar in the folder you should be seeing a path that says \Steam\steamapps\common\7 Days To Die Click on common to go back one level.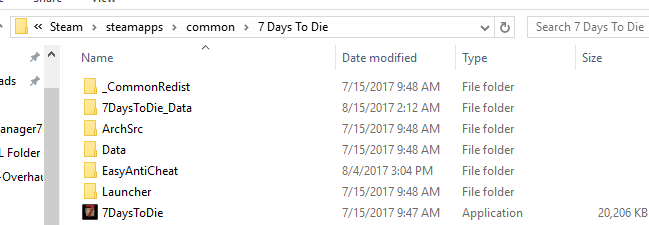
You should now see the whole 7DTD folder. Right-click and copy and paste the folder next to itself so that you have 7 Days To Die & 7 Days To Die – Copy, then go head and open the copy. Going back to your download folder where you earlier downloaded the Valmod pack, open the zip file and extract the files somewhere, if necessary. Once you have the zip file open simply drag and drop the Data and Mods folder from Valmod into your 7DTD-Copy Folder. You should be asked to REPLACE some files, make sure to click YES to this. We are almost done!

In your 7DTD – Copy folder there should be a file called 7DaysToDie_EAC . Double click this files and click on install when the window pops up. This may try to start running the game, if it does close the game out when you get a chance. Next we right click the 7DaysToDie_EAC application file. Create a shortcut, rename it 7DTD-MODDED, or something to where you will know the difference between your normal shortcut to the game, and then place the shortcut where ever you want, like the desktop.
That’s it you are done. Make sure to Run the application the new Modded shortcut, so that you get all the nice new pictures and localization files.
If you have any problems with the install, feel free to contact me, and ill be glad to help you.
Good luck and have fun!
